How to Prepare Your Wall for Tiling
Tiling a wall adds charm and utility. But, as with everything, if you want it to look even half-decent and last, then you will need to spend some time preparing the area for it. In this guide we’ll go through the preparation steps for tiling a wall, giving you professional-looking results & tips for newbies.
Understanding the Importance of Preparation
Before we proceed with laying the tile, it is important to understand why preparation is so necessary. Tiling is Going Better on a Good Surface: A properly prepared surface will allow tiles to stick properly, thus avoiding problems such as cracking in the future or a bumpy floor. In the long term, properly prepared projects also save time and resources.
Assessing the Wall’s Condition
Start with What the Wall Looks Like Check for cracks, holes, or dampness. For this reason, it is very important to deal with these issues before tiling to ensure stability and durability. If there is any moisture, find out the source and remove it, or else your tiles will get damaged.
Cleaning the Surface
Surface preparation is also very important since an adhesive bond can only be created on clean surfaces. Factors such as dust, dirt, grease, previous or old adhesive can hinder the process of bonding. Clean the Wall with a Mild Detergent or Soap Solution Wash out with fresh water and leave to dry fully. If there is a built-up residue, you might need to get a soft brush to help with scrubbing.
Removing Old Wall Coverings
In the case that the wall has coverings, such as wallpaper or paint, they must first be stripped off. Steamer stripping or solvent-based wallpaper remover If the surfaces are painted, you should sand htem lightly but thoroughly to roughen them up so the adhesive will stick better. Make sure to scrape off any loose paint prior to continuing.
Repairing Imperfections
Repair any holes or cracks if they need to be fixed. Fill this up with an appropriate filler, evenly and smoothly. Dry the filler as per the instructions found on a truck over seized car. Allow to dry, then sand to make smooth.
Priming the Wall
It is also important to prime as this step will strengthen the bond of the adhesive to the wall. Select a primer suited to the wall type and adhesive type. Use a brush or roller to spread it evenly according to the guidelines on the product. Do not proceed until the primer has had enough time to dry.
Ensuring a Level Surface
Tile needs to be on a straight surface. Check whether it is even or not using a spirit level. In case of any differences, apply a layer of plaster or leveling compound as a 2nd thin layer, to fit the surface. Allow to dry fully, sand if required for a truly flat wall.
Planning the Tile Layout
Plan Where You Will Place the Tiles From The Beginning, before tiling outside. With this planning, we can avoid cuts like we’re patching a bad cut and achieve a symmetrical finish. To start, simply measure the dimensions of the wall and mark the middle point. Deploy this as a reference so the tiles will lie evenly across the surface.
Gathering Necessary Tools and Materials
All these tools and materials at your disposal, the tiling process becomes easier. Some of the essential tools are tile cutter, adhesive, notched trowel, spacers, and spirit level. Use materials appropriate for the specific kind of tile.
Seeking Professional Guidance
And if there is any doubt about any stage, professionals such as wall tilers in Auckland will have the best-in-the-business experience to answer any concerns you may have. They can provide situation-specific advice and guidance on obstacles that may arise.
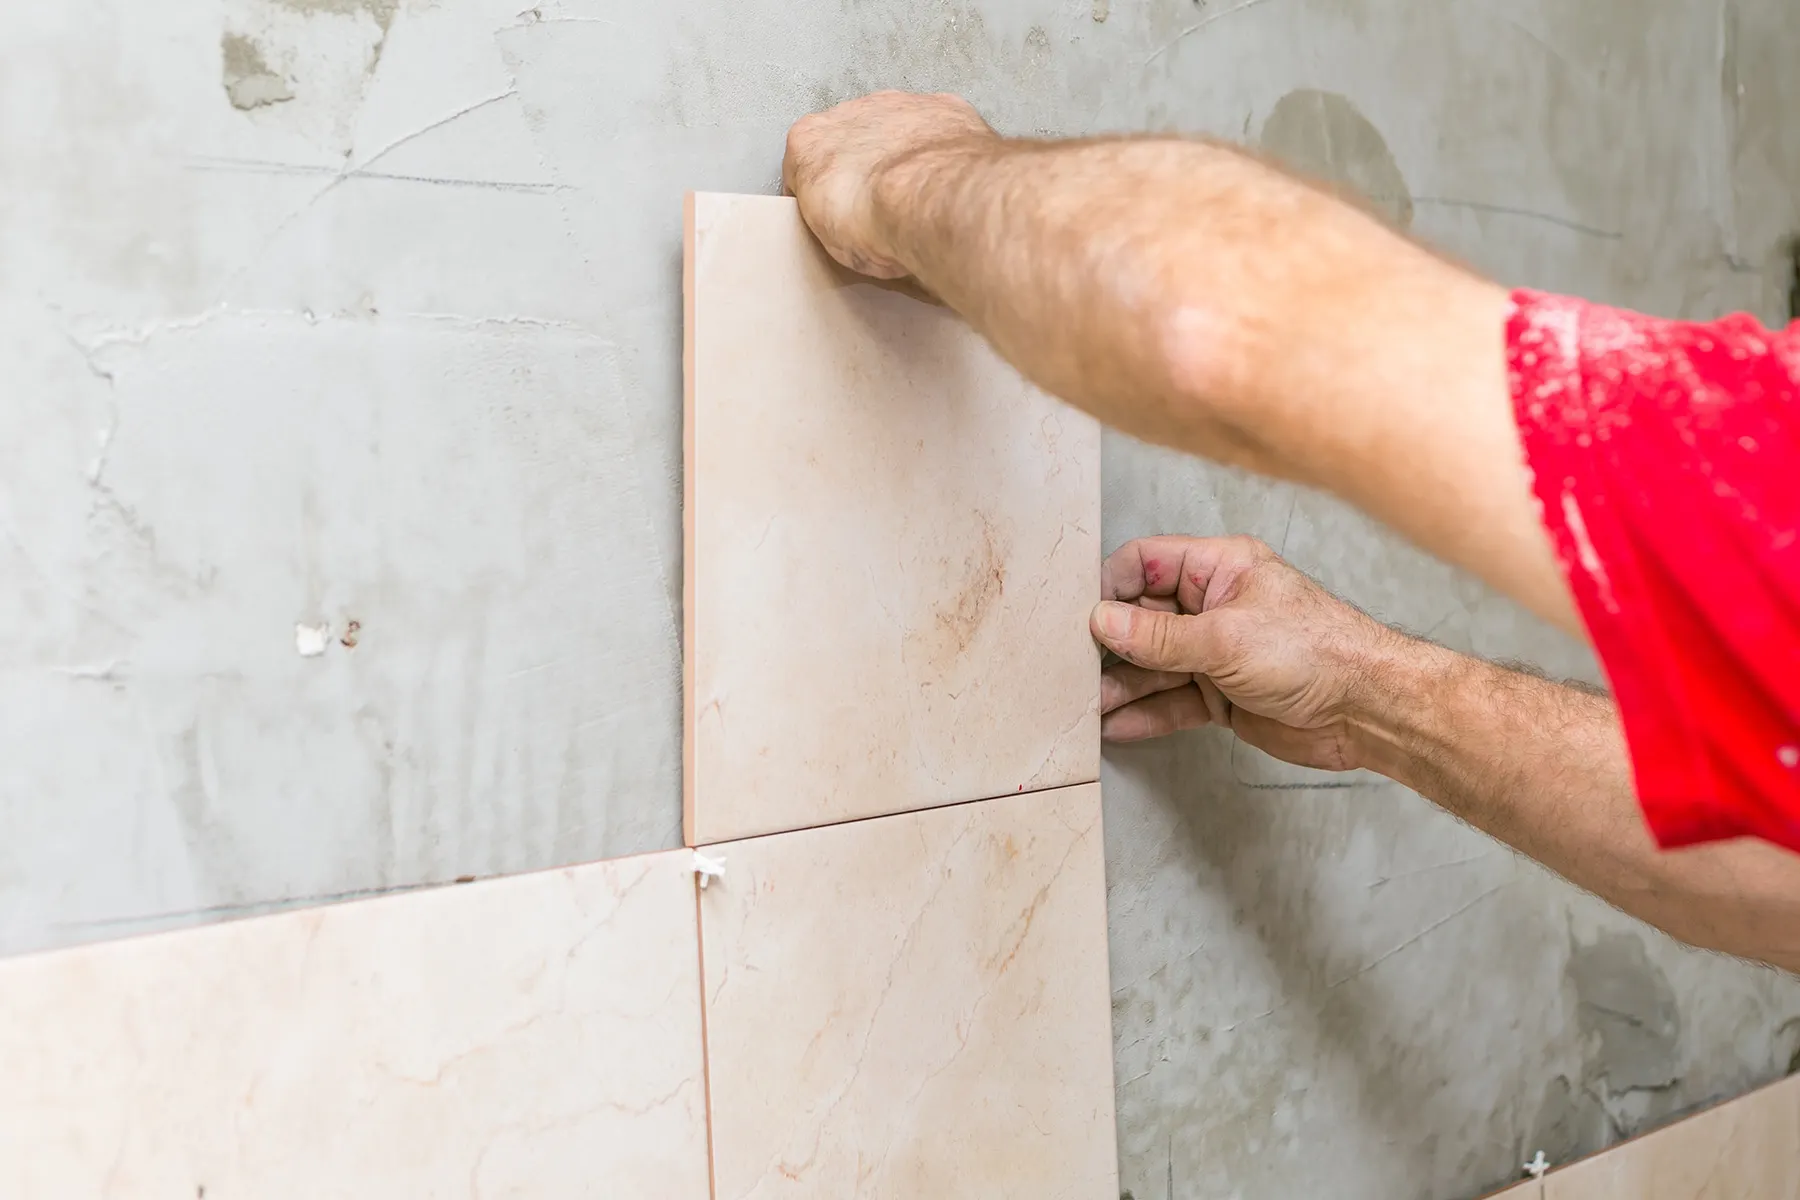
Starting the Tiling Process
After you have prepared that wall, you are ready to tile! Prepare the adhesive per the instructions and spread it to a small area of the wall using a notched trowel. Tightly press each tile into place, using spacers to keep a matching space in between for grout. Check with a spirit level from time to time that it is even.
Allowing for Drying Time
After placing the tiles, let the glue set properly. This step is necessary to make sure that the tiles are well-held. Follow the recommendations of the adhesive manufacturer for the drying time which may vary depending on environmental conditions.
Applying Grout
Once the adhesive has cured, take out spacers and mix the grout. Use a rubber float to press it into the spaces between tiles. Using a damp sponge, remove any excess grout but do not disturb the tiles. Wait for full grout cure before letting the area come into contact with water.
Final Touches and Maintenance
Finally, check the tiled wall for any dirt or loose tiles. Take care of these instantly if you want to maintain the condition of the tiled area. Maintain for a fresh look. Clean your tiles on a regular basis to ensure that no dirt and grime builds on them.
Conclusion
Preparation is a cornerstone for any tiling job. With the attention to steps here, you can make sure your walls are up to the job of being tiled and that your finished product will stand the test of time as well look great too! Those wishing to get professional tips are to speak to specialists in wall tilers in Auckland, however a couple of helpful tips can be discovered here. Following the steps outlined, a beautiful tiled wall can result, adding just that touch needed for any space.


Post Comment